...
...
...
...
...
...
1. Checking out the ole-rice codebase
1. Checkout the ole-rice2 codebase from ole-rice2 (https://svn.kuali.org/repos/ole/trunk/ole-rice2)
| Info | ||||
|---|---|---|---|---|
| ||||
Create a file called common-config.xml under "user.home"/kuali/main/dev/. Alternatively you can copy it from the helperfiles folder within the codebase. Create a file called rice.keystore files under "user.home"/kuali/main/dev. Alternatively copy the rice.keystore file as well from the helperfiles folder within the project codebase and place it under "user.home"/kuali/main/dev. |
2. DB Setup
a. MYSQL:
In order to get a local database setup with rice and ole tables the following maven command needs to be executed from the ole-rice-db module in the project folder; mvn -Pmysql clean initialize. This will setup the rice/ole database with all the necessary data.
3. Clear your .m2/repository/org/kuali/rice Folder
- In order to start clean and to ensure there weren't any older versions of rice.jars around, need to wipe out the entire rice folder.
4. Run mvn clean install
- Navigate to the project directory and execute the following command: mvn clean install -DskipTests=true
5. Setup IntelliJ Project
1. Launch IntelliJ
2. Under the Quick Start menu click Open Project
...
| Info | ||
|---|---|---|
| ||
IntelliJ detects various facets if available and will prompt you to automatically create as part of the project configuration. You should accept when prompted or click on the create options when presented. Also once IntelliJ is done with all the processes you need to right click on the main project and go down to the maven menu option and click on "Force Re-import". This is needed the first time you will download the codebase and whenever there are changes made to the pom.xml. |
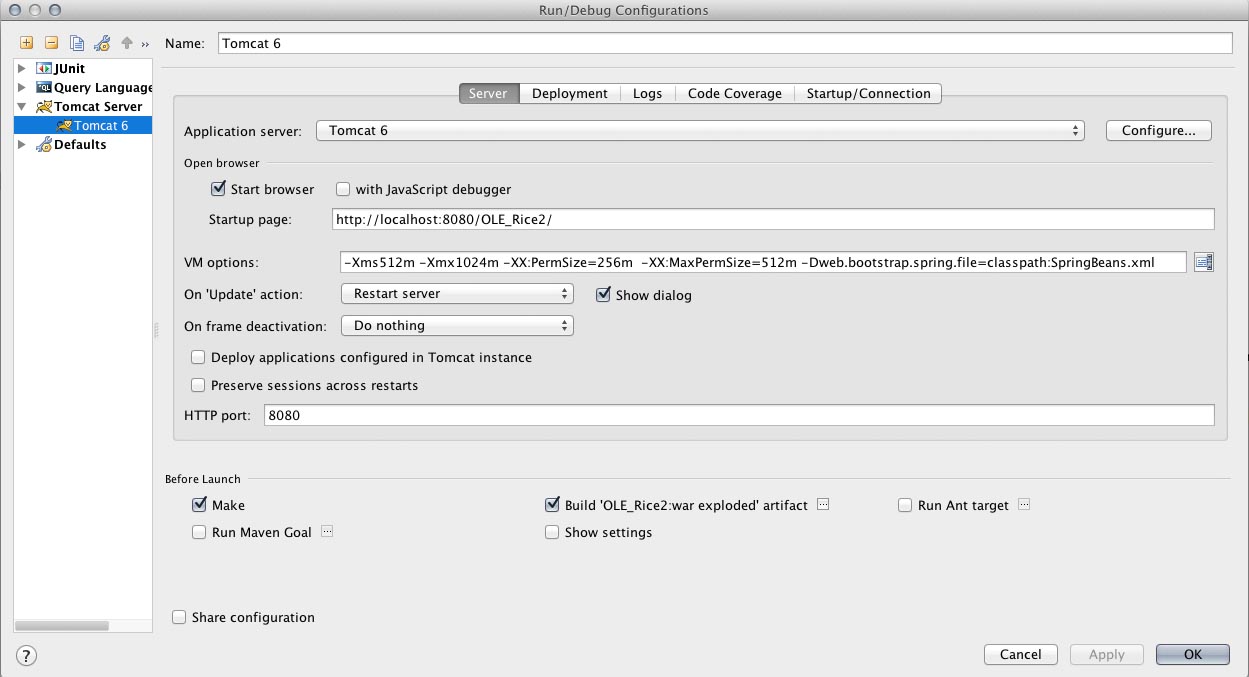
6. Setup Tomcat Configuration
| Info | ||
|---|---|---|
| ||
Note - The artifact that you will need to mark for deployment will be 'OLE_Rice2:war exploded'. Also make sure the webapps folder in your default tomcat folder does not have any other war files (.war or folders) vm options: -Xms512m -Xmx1024m -XX:PermSize=256m -XX:MaxPermSize=512m -Dweb.bootstrap.spring.file=classpath:SpringBeans.xml |
7. Launch App
Launch the app program by running tomcat. In the login prompt enter admin as the username and you should get to the main menu.