| Warning | ||
|---|---|---|
| ||
Before starting this process. Please VERIFY that all the needed AMIs and Database Snapshots are present BEFORE terminating any instances. If the AMIs/Snapshots are missing for any reason, then there will be no way to recover the demo instance without recreating it from scratch. The Snapshot and AMI names are in yellow boxes in their respective sections. |
Terminate Instances
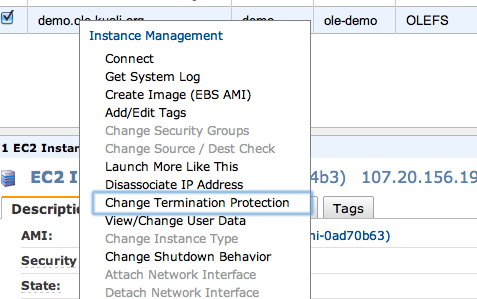
Disable EC2 Termination Protection
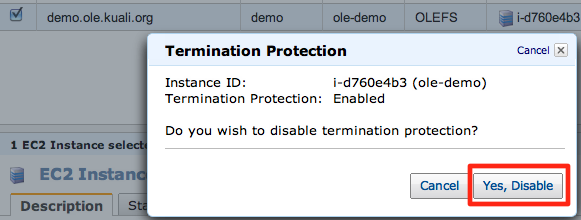
Right click on the instance and select "Change Termination Protection" from the menu. | |
Confirm the action. | |
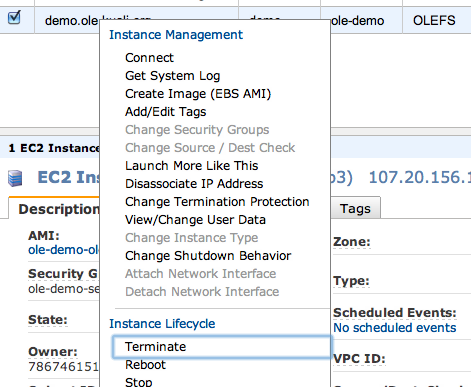
Terminate OLEFS and Docstore Demo EC2 Instances
Right click on the instance and select "Terminate" from the menu. | |
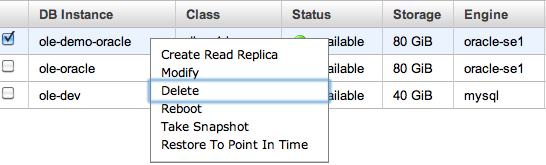
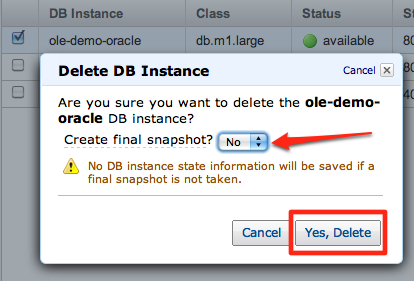
Terminate the ole-demo-oracle RDS Instance
Right click on the instance and select "Delete" from the menu. | |
Decline creation of the final snapshot. (We already have one.) | |
Restore Instances
Restore Demo Database From Snapshot
| Note | |
|---|---|
|
...
- Associate Elastic IP Address
...
- Assign Dynamic DNS
us-east-1a
security group
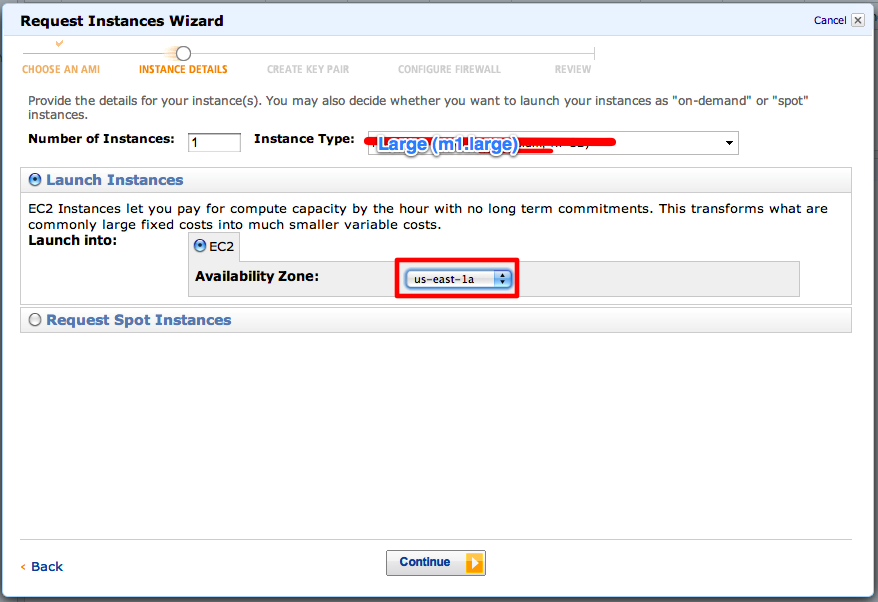
c1.medium (olefs)
m1.large (docstore)
...
| |
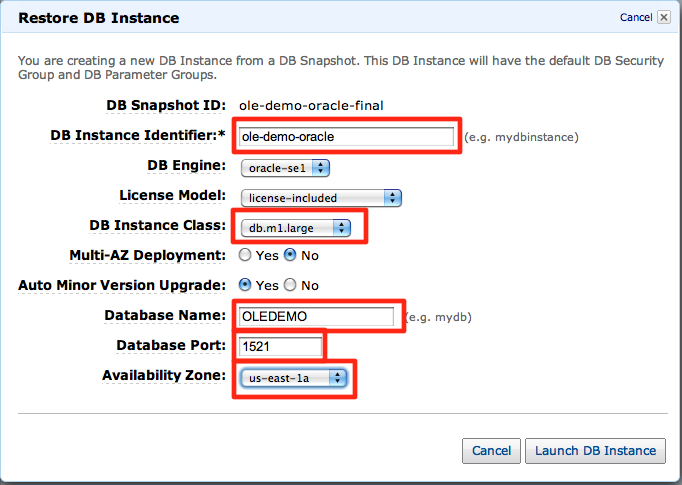
ole-demo-oracle-refresh |
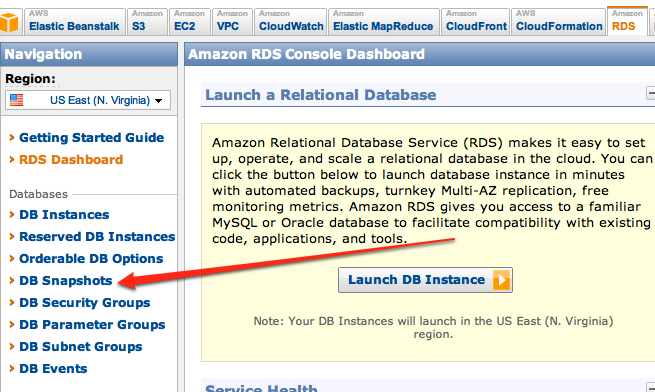
Open the DB Snapshots view. | |
Right click on the snapshot and select "Restore From DB Snapshot". | |
Fill out the resulting window as shown. Items which need to be entered/changed are highlighted. | |

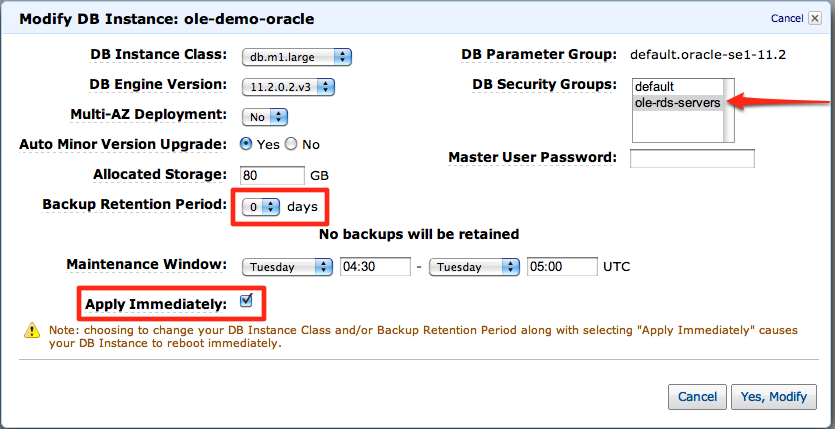
Set Instance Attributes
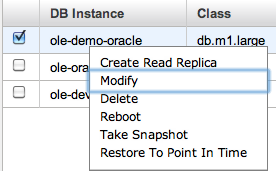
Amazon RDS does not allow setting of some attributes when restoring from a snapshot. So, after the instance has completed starting up, you must perform the steps below.
Right click on the instance and select "Modify". | |
| |
Wait for the database to complete modifications before starting the next steps. | |

Restore OLEFS Demo Instance
| Note | ||
|---|---|---|
| ||
ole-demo-olefs-refresh |
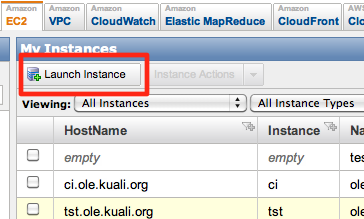
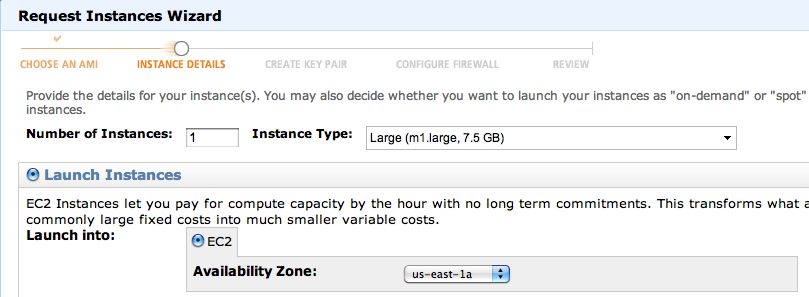
On the Instances page, click "Launch Instance" | |
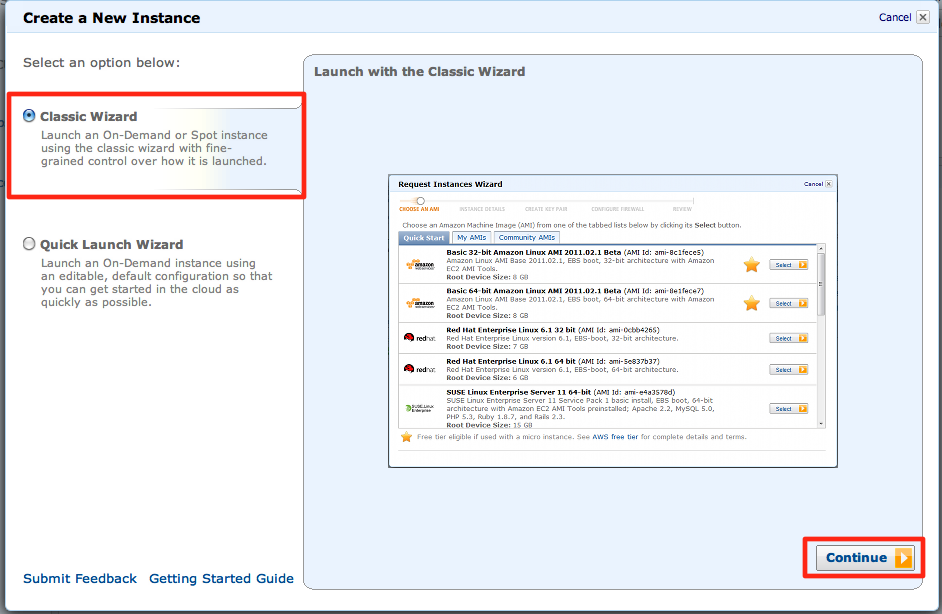
Select the "Classic Wizard" and click continue. | |
Click on the "My AMIs" tab and the select button on the appropriate AMI for the OLEFS Demo Instance | |
Create it with a | |
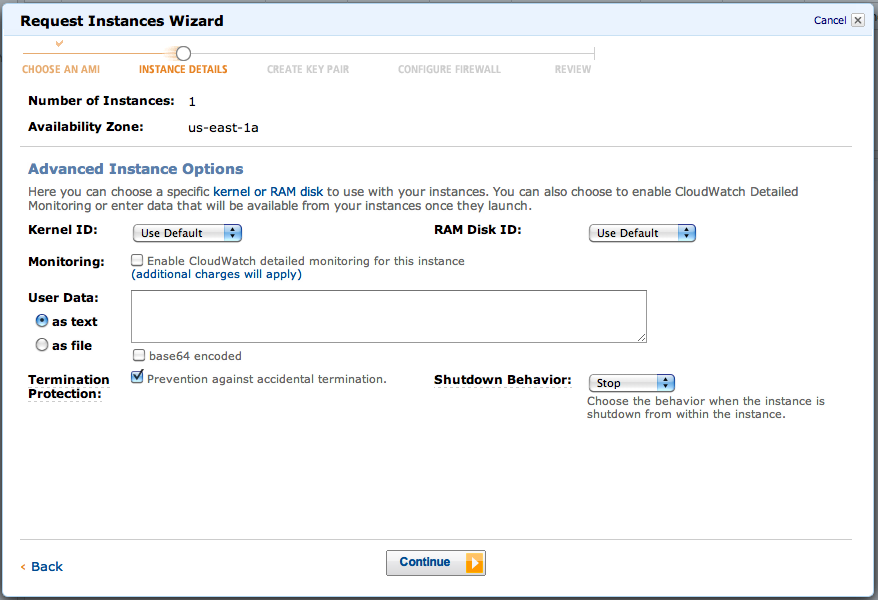
On the next page, check the "Termination Protection" box. | |
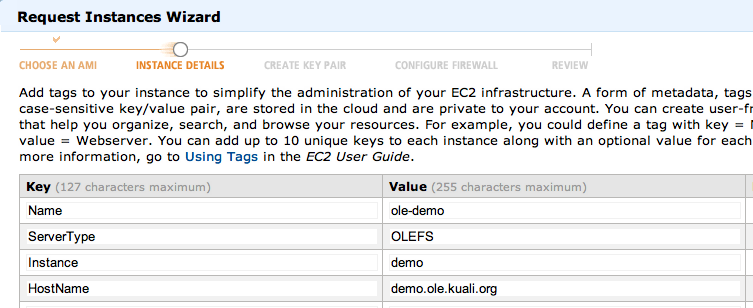
Fill out the Tags screen as shown. | |
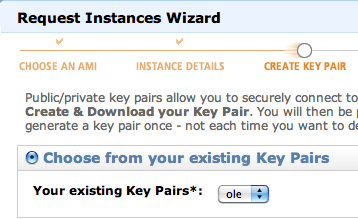
On the next screen, ensure that it is using the "ole" keypair. | |
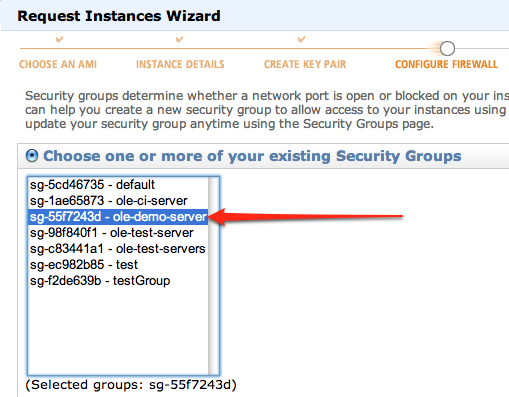
Select the | |
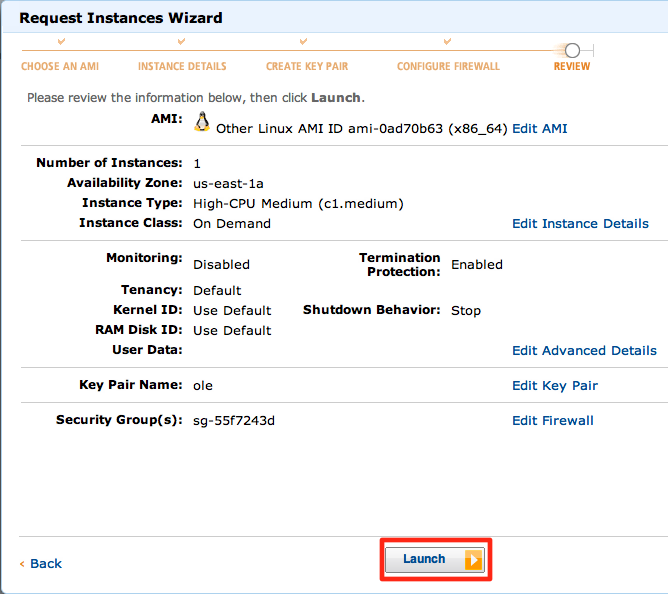
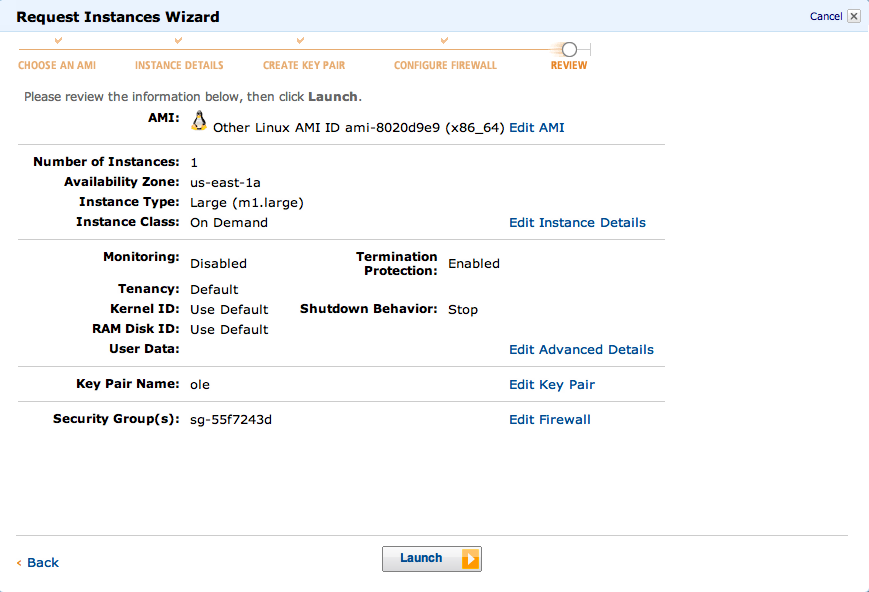
Review the settings and create the instance. | |

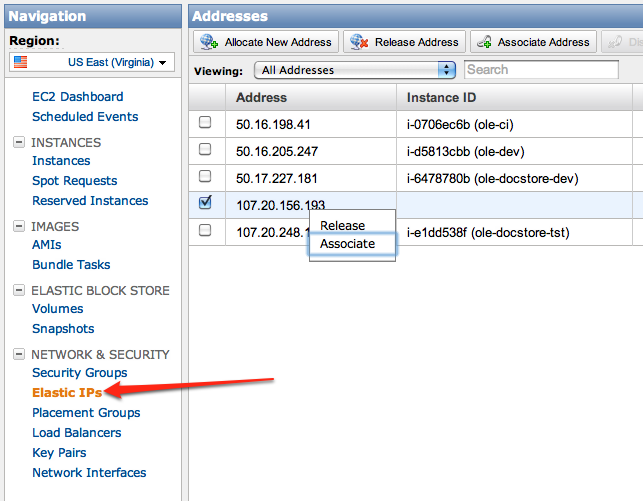
Associate Elastic IP Address
The OLE Demo Application server uses an Amazon EC2 Elastic IP address which allows us to assign that IP address to newly created instances and not have to redefine DNS.
After the instance above has started, go to the "Elastic IPs" page, right click on the | |
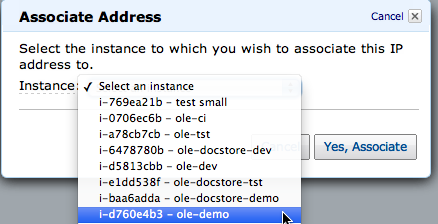
Select the "ole-demo" instance from the drop-down list and associate it. | |
Restore OLE Docstore Demo Instance
| Note | ||
|---|---|---|
| ||
ole-demo-docstore-refresh |
NOTE: This instance will take considerably longer to restore, as the drives attached to the it are ten-times larger than the OLEFS instance.
On the Instances page, click "Launch Instance" | |
Select the "Classic Wizard" and click continue. | |
Click on the "My AMIs" tab and the select button on the appropriate AMI for the OLE Docstore Demo Instance. | |
Create it with a | |
On the next page, check the "Termination Protection" box. | |
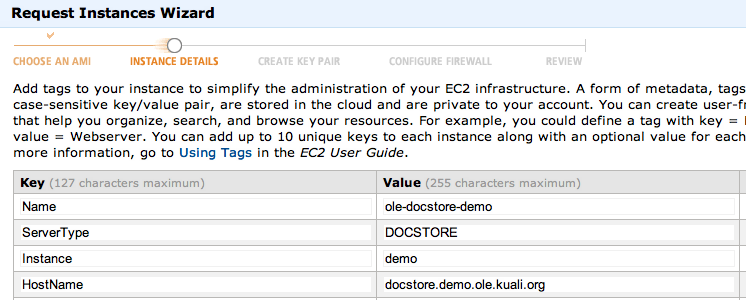
Fill out the Tags screen as shown. | |
On the next screen, ensure that it is using the "ole" keypair. | |
Select the | |
Review the settings and create the instance. | |
Associate Elastic IP Address
The OLE Demo Application server uses an Amazon EC2 Elastic IP address which allows us to assign that IP address to newly created instances and not have to redefine DNS.
After the instance above has started, go to the "Elastic IPs" page, right click on the | |
Select the "ole-demo" instance from the drop-down list and associate it. | |